Which tools pair best with Manuscript paper
Sketchbook paper isn’t just a background. It’s a material that determines how your tool behaves: whether the line stays crisp, whether ink or туш spreads, and whether a marker bleeds through. Manuscript uses Swedish design paper, 150 g/m² in a creamy tone—with minimal texture and no sizing for a big amount of water. This isn’t watercolor paper, and we’re not trying to make it one.
This guide is the result of real testing with different tools, not reading specifications. Here you’ll find what works amazingly, what’s pleasant to use, and what’s better to avoid. Jump straight to the section you need, or read everything in order—each technique is independent.
Liners and rapidographs
Liners are one of the most popular tools for working with Manuscript. 150 g/m² paper handles both waterproof (Micron, Copic Multiliner, Staedtler) and alcohol-based (Winsor & Newton) liners perfectly. No smearing—lines stay crisp.
Rapidography (urban sketching) is a special case. When drawing en plein air, artists often combine a liner, fine ink wash/diluted туш, and light watercolor—all of which Manuscript paper handles well. Even outdoors.
| Type of liner | Examples | Base | Bleed-through | Rating |
|---|---|---|---|---|
| Waterproof liner | Micron, Staedtler | Water | None | ✅ Perfect |
| Alcohol liner | Copic Multiliner SP | Alcohol | None | ✅ Excellent |
| Alcohol marker | Winsor & Newton | Alcohol | Minimum | ✅ Good |
| Office marker | Various | Water | Possible | ❌ Not recommended |
Tip
- Start with a sign/guide stroke, then add a shadow with a liner or туш.
- Try shading with pressure—fine туш gives an interesting textured effect on creamy paper.
- Since the paper doesn’t absorb water right away, you can add washes—but the amount of water matters.
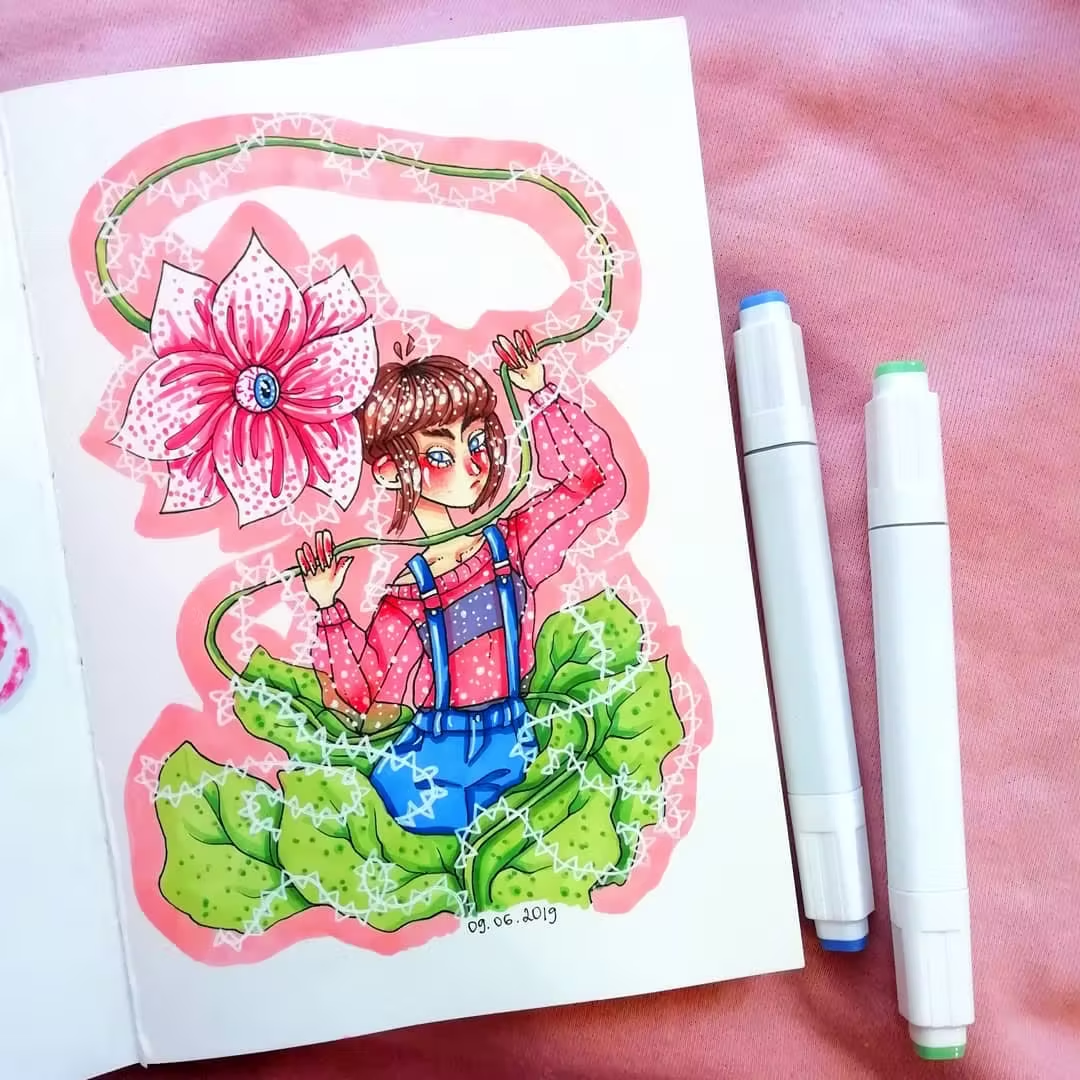
A video review by artist Anna (@suzuakai) confirms: liners (including Sakura Micron) glide over a smooth surface very smoothly, without meeting any resistance. Lines come out even and don’t spread at all. Color liners behave the same way, though when layered they may darken—that’s a pigment feature, not a paper one. Gel and ballpoint pens also showed an excellent result: they glide easily and layer well; the ballpoint pen allows for expressive graphic work.
Markers: alcohol, spirit, and water
Alcohol markers
Alcohol markers (Copic, Letraset Promarkers, Touch Twin) are one of the most challenging techniques for any paper. Manuscript handles it: the liquid seeps through to the back of the page by about 20–30%, but not through to the other side. It doesn’t affect the front—the color stays even and doesn’t “burn” through the sheet.
There’s another advantage of creamy paper: it slightly “warms up” the cool tones of markers. Cool grays become more neutral, skin tones look more natural. This isn’t marketing—it’s the physics of how a paper’s color interacts with pigment.
Life hack: if your markers bleed through, place a clean sheet of paper under the page. This is the standard method when using alcohol markers, regardless of the sketchbook.
Based on Anna’s observations (@suzuakai), Touch5 and Copic markers feel natural on this paper: they glide nicely, layer beautifully (for example, when drawing skin) and don’t dry out too quickly during the process. The major downside is the same as with any non-specialized paper: alcohol markers strongly bleed to the back, so you should always place a scrap sheet under your page.
This photo shows a swatch of different Copic marker colors.
Water-based markers
Brush-based water markers (Tombow Dual Brush Pen, Pentel Aquash) work well for lettering and colored accents. The paper accepts the ink without significant cockling if you work quickly and don’t over-wet the surface. Avoid filling large areas—this paper isn’t designed for that. But a smooth gradient or a colored background for lettering comes out great.
Watercolor markers
Anna (@suzuakai) also tested watercolor markers: they don’t bleed through to the back. With light application they behave normally, but as soon as active layering starts or water is added, the paper can’t handle it and begins to roll up into pills. You can use them, but carefully: without excessive wetting of the surface.
India ink: a classic for experienced users
Tuş (india ink) is one of the oldest and most demanding techniques. Manuscript paper handles both Chinese and Japanese туш (sumi-e), as well as European options (sepia, bistre).
Chinese and Japanese туш: dense, opaque, and lays down beautifully with a brush or a dip pen. Black on a creamy background looks warmer than on white—this is valued in urban sketching and botanical illustration. For sumi-e with diluted washes: don’t over-wet; let each layer dry completely.
European туш (sepia, bistre): warm tones play especially beautifully on creamy paper—the shades complement each other. Bistre looks antique—like a page from an old diary.
Fine nibs and pressure: the paper doesn’t fluff up under the pen—the texture is minimal. Fine nibs (EF, F) produce clean hairlines. Drying time: ~60 seconds for light strokes, up to 5 minutes for dense coverage. Apply markers or washes only after the ink is fully dry.
Calligraphy and lettering
The creamy tone and smooth surface of Manuscript make it a top choice for calligraphy. Dip pens, parallel nibs (bamboo), pen-and-ink (dip pen туш)—all of these give a crisp stroke without fluffing the surface. The paper doesn’t tear fibers, which is critical for consistent line quality.
Brush lettering
A smooth surface is ideal for brush pens (Tombow, Pentel Fude Touch, Kuretake). The main advantage: the brush doesn’t catch on the paper texture mid-stroke, which is crucial for a stable transition between thick and thin in brush lettering. We recommend starting with practice hair strokes—this will help you feel how the paper responds to different pressure.
Why the creamy tone is convenient for calligraphers
Creamy paper reduces eye strain during long calligraphy sessions—the clear white sheet tires you out significantly faster. Also, black ink on cream looks rich rather than harsh—especially noticeable in classic styles (copperplate, Gothic, uncial).
Graphite and pencil
Graphite on Manuscript paper goes on smoothly and leaves no extra artifacts. A pencil is one of the best-bonded tools for everyday practice. Soft graphite HB–2B makes it easy to apply a sketch and erase without requiring extra effort—the paper erases cleanly, without pilling.
The paper texture is minimal, so shading stays even without a gritty effect. Pastel and colored pencils (Faber-Castell, Caran d’Ache Luminance) layer well over a graphite line—blending stays controlled, and blending with a tortillon or a finger works without problems.
Charcoal: suitable for quick gesture sketches, but the smooth surface holds charcoal worse than rough paper. Better: compressed charcoal instead of vine; fixative is a must and should be applied immediately.
A mechanical clutch pencil with a 2B lead in Anna’s test (@suzuakai) went on smoothly, produced a pleasant sound while drawing, and strokes blended well. Since the layer can be fairly thick, the pencil may smudge, so finished work should be sealed with varnish. Colored pencils are subjective: you can draw with them, but on smooth paper the pigment “grips” less well than on textured paper. For colored pencils, a grainy surface works better, where there’s something for the pigment to catch on.
Mixed techniques
Artists rarely work with a single tool. Here are three combinations that work especially well on Manuscript paper.
Liner + watercolor wash
The most common urban sketching workflow. Draw the outline with a waterproof liner (Micron, Staedtler) and let it dry for 60 seconds. Then add a light watercolor wash with minimal water—1–2 passes without re-wetting. The paper holds up without significant cockling. The main rule: light, fast, and don’t over-wet.
Drawing by @karrinart
Tuş + graphite
A classic studio sketch. First, a light pencil sketch, then туш with a pen or brush over it. After the ink is fully dry (at least 15 minutes for dense areas), erase the pencil. Smooth paper erases cleanly, without pilling—no construction lines remain.
Calligraphy + marker
First, write the form with a dip pen or a brush pen. Let the ink dry completely: waterproof—60 seconds, regular—3–5 minutes. Then apply a colored marker as a background or accent. If you apply an alcohol marker on still-wet ink, it will spread. Patience is part of the technique.
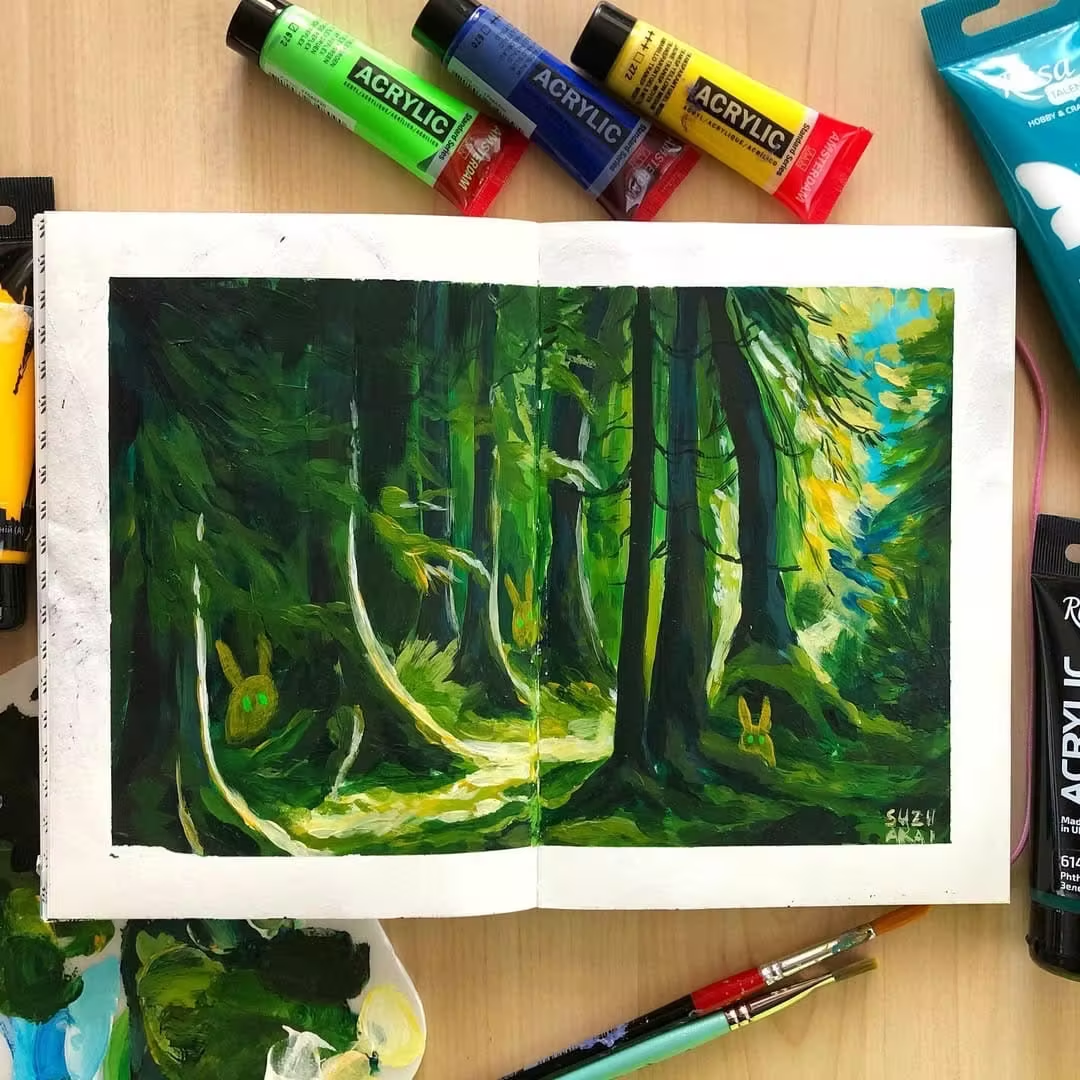
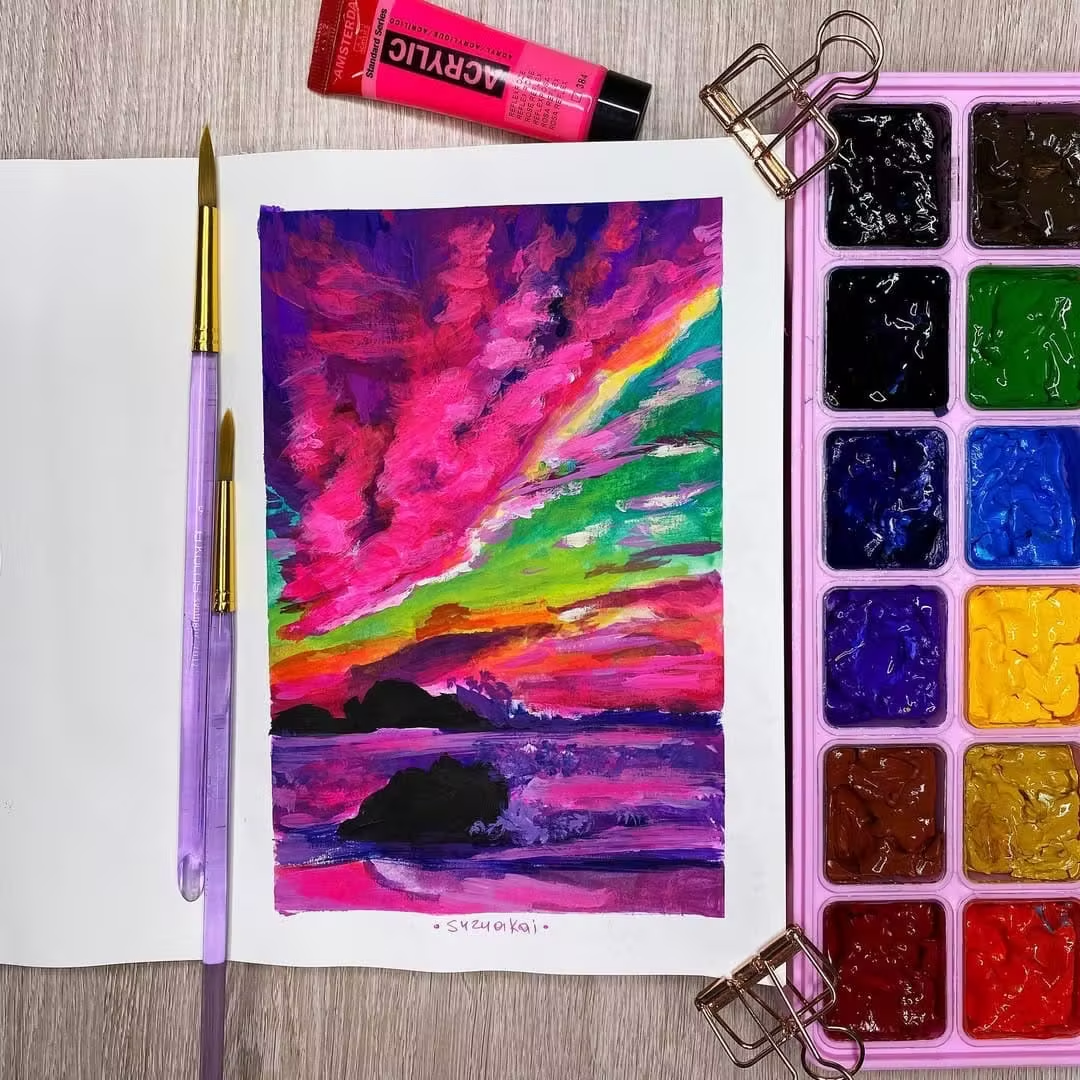
Acrylic and gouache
Two materials that are rarely associated with sketchbooks, but they perform excellently on Manuscript paper—according to a video review by artist Anna (@suzuakai).
Acrylic (Amsterdam): goes on very evenly and pleasantly. Thanks to the paper’s smoothness, there’s no resistance when painting over. The main plus: sheets barely deform from acrylic and stay flat.
Drawing by @suzuakai
Gouache (Master-Class): applies well and allows for beautiful gradients. Even with a small dilution with water, the paper handles it and doesn’t create strong waves.
Drawing by @suzuakai
What doesn’t work for Manuscript
Honestly, there are tools for which Manuscript isn’t the best choice.
A straightforward answer
Video by @tuchina_art
Manuscript is optimized for dry and semi-wet techniques. If your main practice is heavy watercolor or oil media, there are paper blocks better suited for these tasks. Acknowledging that isn’t a weakness of the brand—it’s honesty about the material.
- Heavy wet watercolor—a large volume of water causes cockling. 150 g/m² paper isn’t sized for a proper wet-on-wet technique. For one light wash as part of a mixed technique, it’s pleasant. For real watercolor, you need a 200–300 g/m² block.
- Oil pigments—the paper can’t handle oil: it soaks through and may damage neighboring pages. For an oil painting, you need suitable art paper or a primed surface. Although our users used oil, they were fairly experienced artists who knew how oil behaves and how to master it.
- Spray paints—need a porous surface for adhesion and preparation. On smooth paper, they spread. Better: kraft paper or coated/dusted cardboard.
- Thick acrylic paints—the heavy acrylic layer cracks when the sheet is bent. Thin acrylic layers—are pleasant to work with.
Frequently asked questions
Can I use Manuscript for watercolor?
For a light wash as part of a mixed technique (liner + watercolor)—yes. For full watercolor wet-on-wet with multiple wet layers—no; the paper starts to cockle. Best: one smooth pass with a minimal amount of water.
How long does ink need to dry before you can draw over it with a marker?
Waterproof туш: 60 seconds for light strokes, 5 minutes for dense coverage. If you apply an alcohol marker to still-wet ink, it will spread. Better to wait an extra minute than to redo the work.
Do Copic markers leave an imprint on the next page?
No. Alcohol markers bleed through to the back of the same page (20–30%) but do not transfer to the next page. In any case, place a clean sheet under your page—this is standard practice.
Which Manuscript sketchbook format is best for calligraphy?
For travel and daily practice—A5 with a hard cover: compact, opens to 180°, and is comfortable to hold in your hand. For studio work—A4. Check Manuscript sketchbooks—all formats open to a full spread.
Share your result with the hashtag #manuscriptkyiv—we love to see which techniques you choose and what you get with different tools.